This post was last updated on July 19th, 2024 at 03:36 pm.
In Part One of this series, we learned that a fund transfer represents a reallocation of liquid assets from one fund to another. We also learned about the four main situations in which funds transfer money, and how to record a fund transfer in IconCMO. In Part Two, we turn our attention to account transfers and how a transaction for this type of transfer can be created or modified.
Try our Church Management Software.
Account Transfers
An account transfer is the process of changing the allocation of dollars to an alternate account. In IconCMO, journal entries can be created in General-Ledger: Journal Entries. They can be modified in General-Ledger: GL-Register.
Transfers From Savings to Checking
An example of an account transfer might be the transfer of money from the church’s savings account to its checking account. However the money stays within the same fund. In this example the money stays in the General Fund, and only the asset accounts — checking and saving is changed.
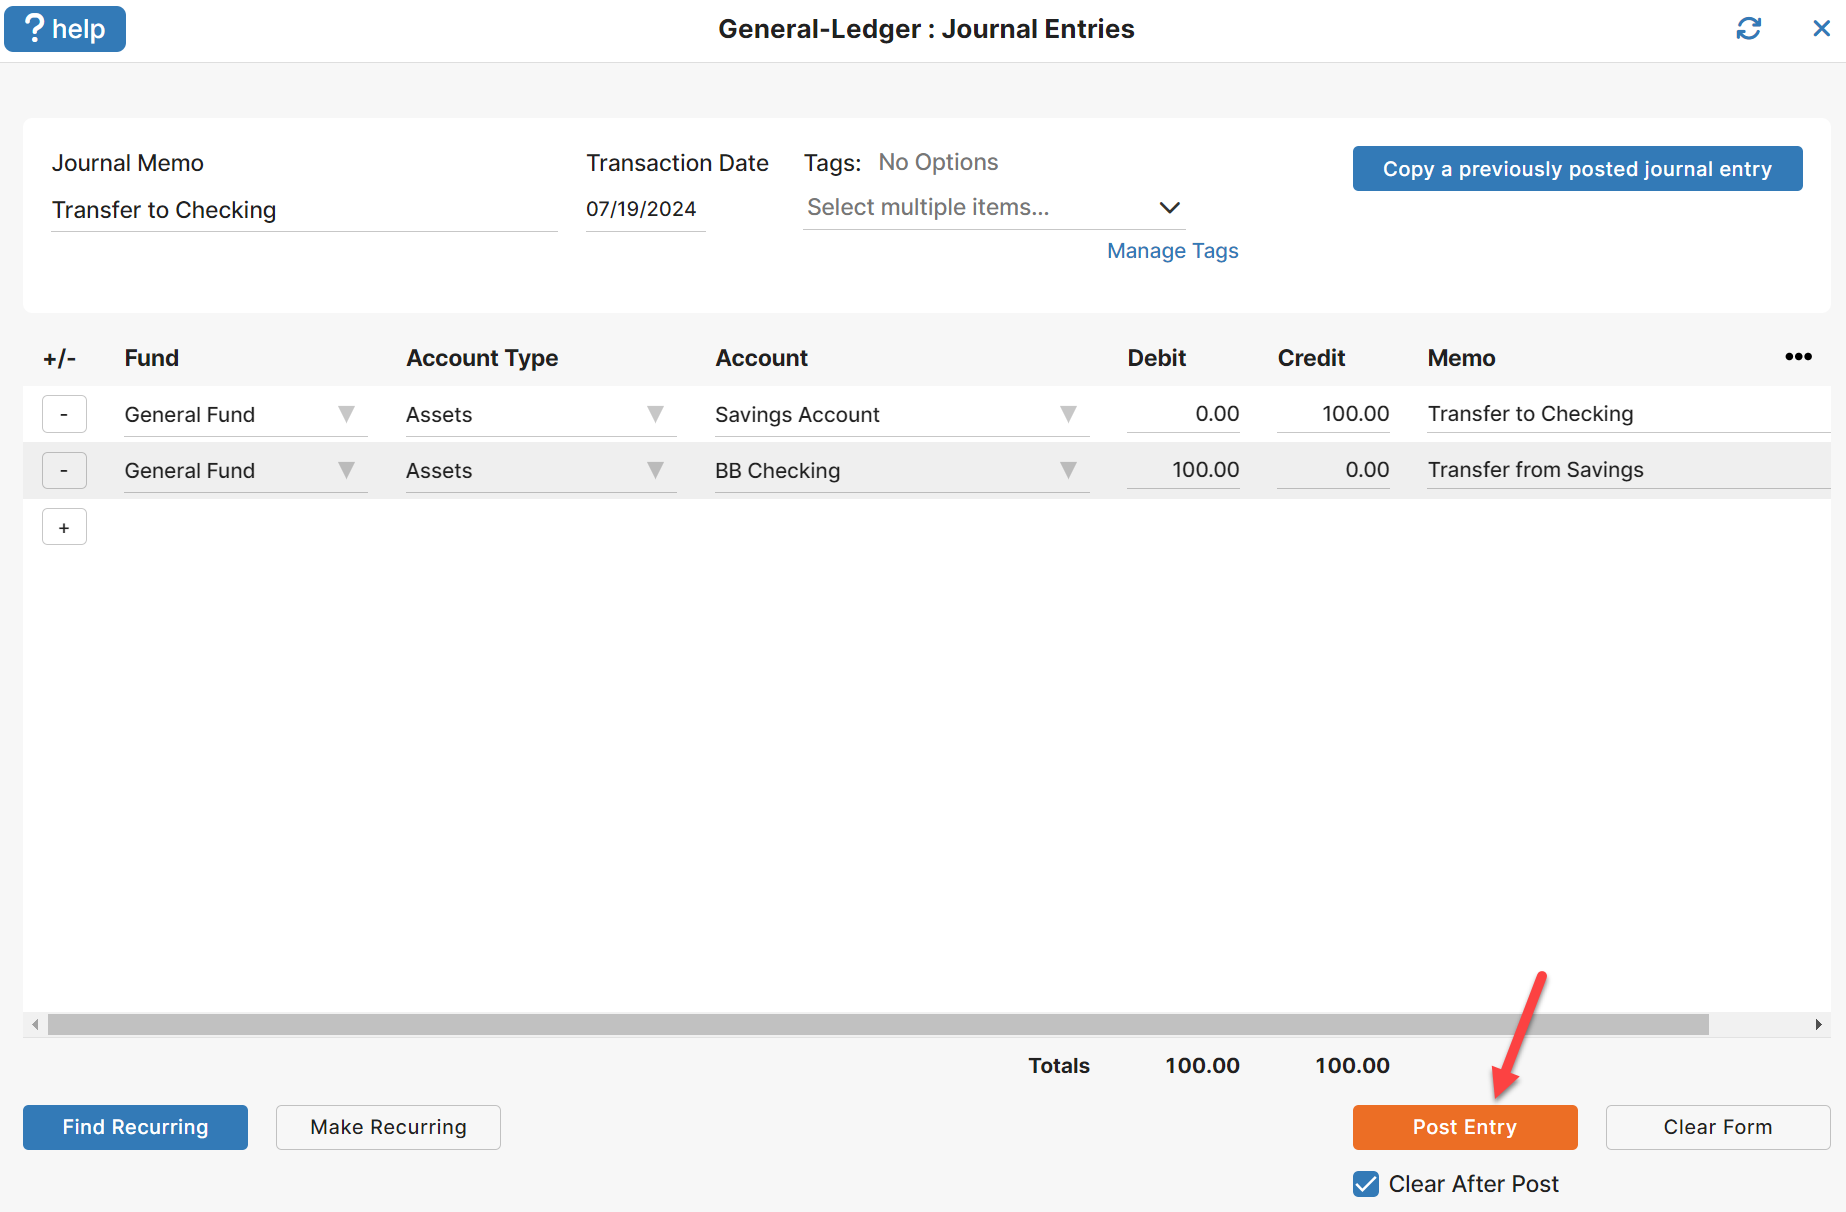
Creating the Journal Entry
To create the new journal entry, we’ll go to General-Ledger: Journal Entries. As we create the necessary entries for this transaction, keep in mind that the first three fields, General Journal Memo, Transaction Date, and Fund are entered once for an entire journal transaction. Whatever these three fields contain prior to posting is what will be used for the entire transaction.
In this example, we’ll enter “Transfer to Checking” in the Journal Memo field, the appropriate date in the Transaction Date field (NOTE: clicking on the box for the Transaction Date will pop the calendar tool). The system defaults to give you two lines right away for the entry; an asset account type on the first line and an expenditure on the second. These can be modified in the drop down menus. It also defaults to the General Fund which can also be changed. For the credit side of the transaction, we’ll select an Account Type of “Assets”, select “Savings” for the account, enter the credit amount of the transfer and verify/change the Line Item Memo. Since this example is an Asset to Asset transaction, you will tab through to the second line and change the Expenditures to Asset, as seen in Figure 1.

The debit side of the transaction is very similar, except this time we choose the checking account as the account and enter the debit amount. Once you’ve verified the entries as being correct, clicking the Post Entry button will post the transaction to the General Ledger.
Changing the Account Assignment
An example of modifying a transaction to allocate dollars to a different account might be to designate a different expense account from the one used in the original transaction. Let’s say that Church ABC issued a check, and the transaction debited an expense account called “General Building Maintenance.” Later on the church council decides that was the wrong expense account to use. They want it changed from “General Building Maintenance ” to “General Grounds Maintenance “. The original transaction entry is shown in Figure 3.
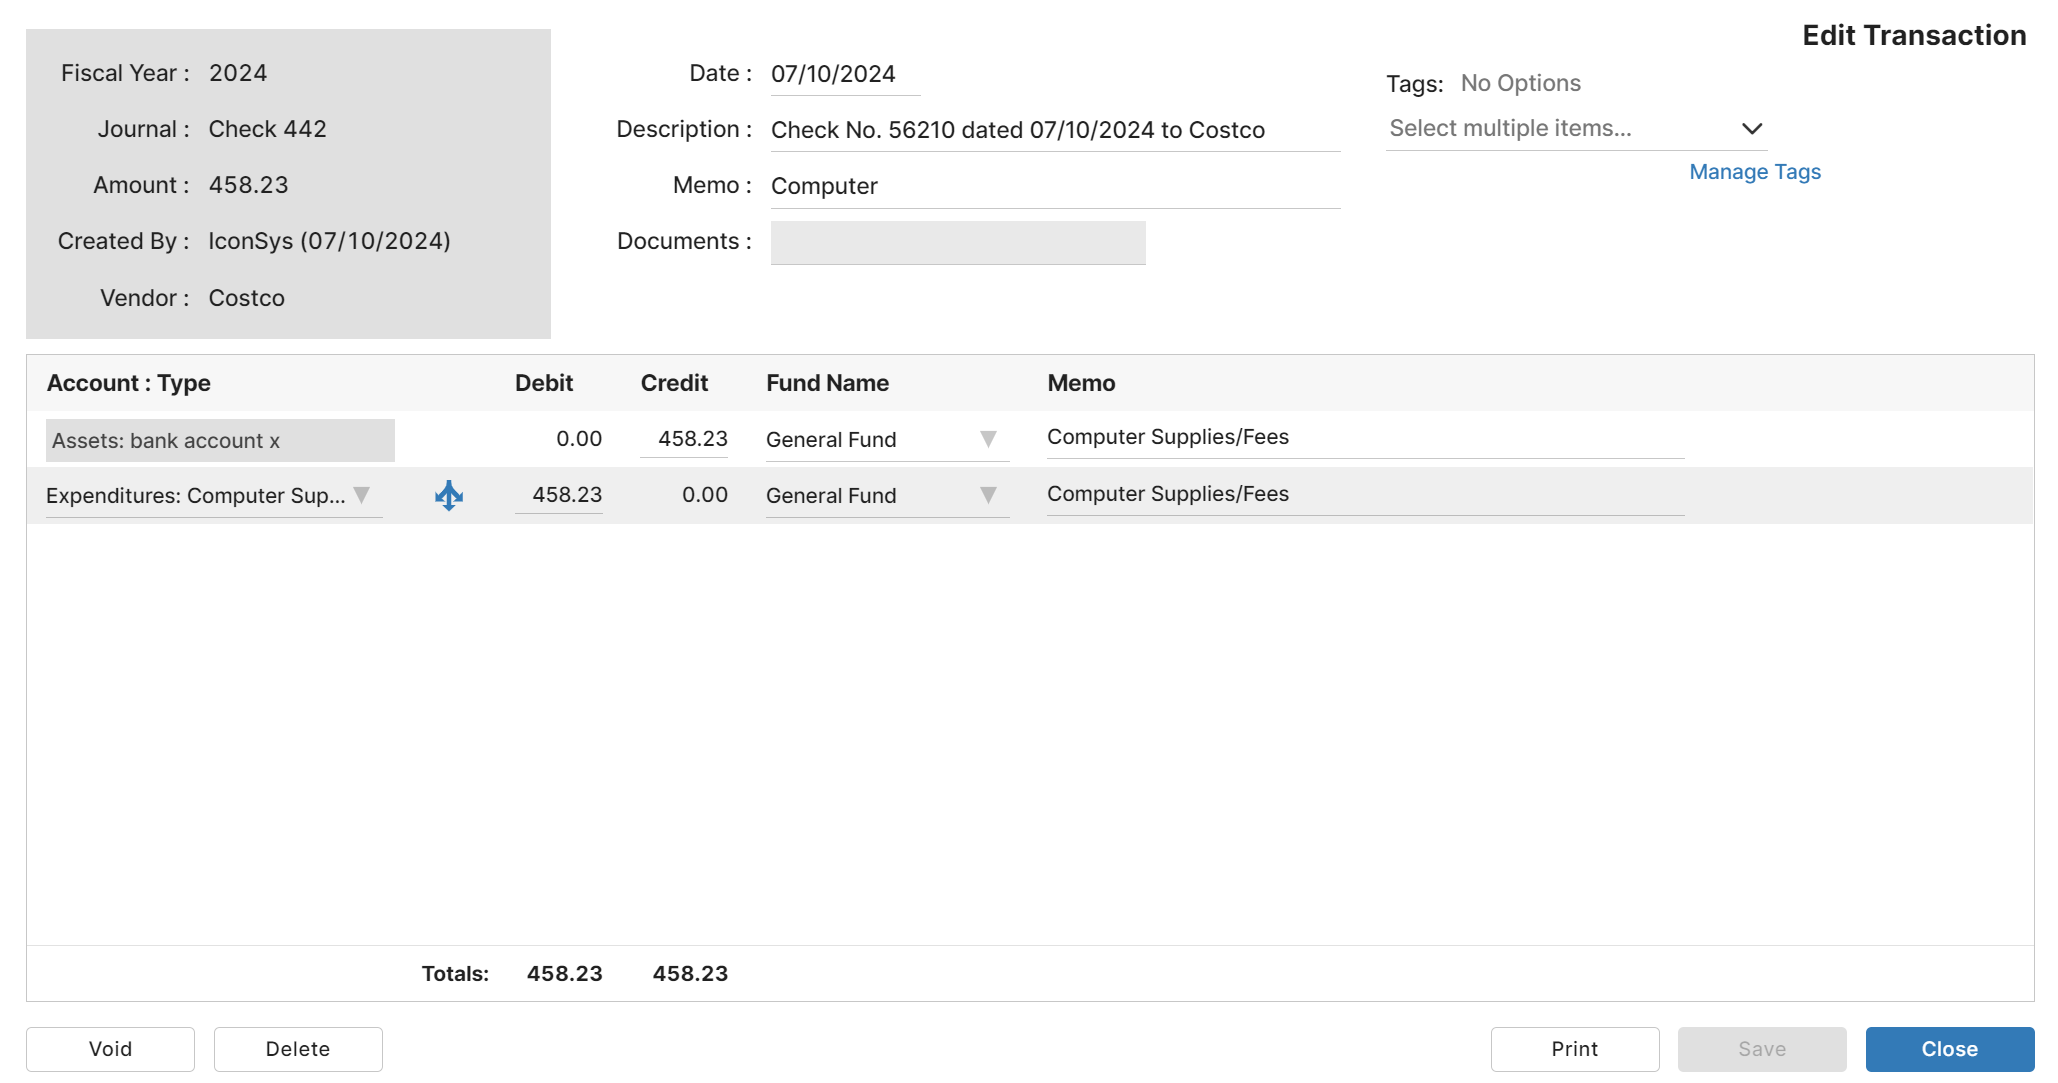
Identifying the Transaction
The change needed can be easily made by noting two specific pieces of information, the Journal Type and the Journal Number. In this case, the Journal Type is “Check” and the Journal Number is “442.” Using this information, we can go into General-Ledger: GL Register and make the necessary changes. Once in the GL Register, we can search for the transaction by simply typing “Check442” into the search bar and then clicking on the transaction to view it. The viewing would bring up Figure 3 above.

Editing the Transaction
The user can edit the transaction using the “distribute” link found on the expense disbursement.
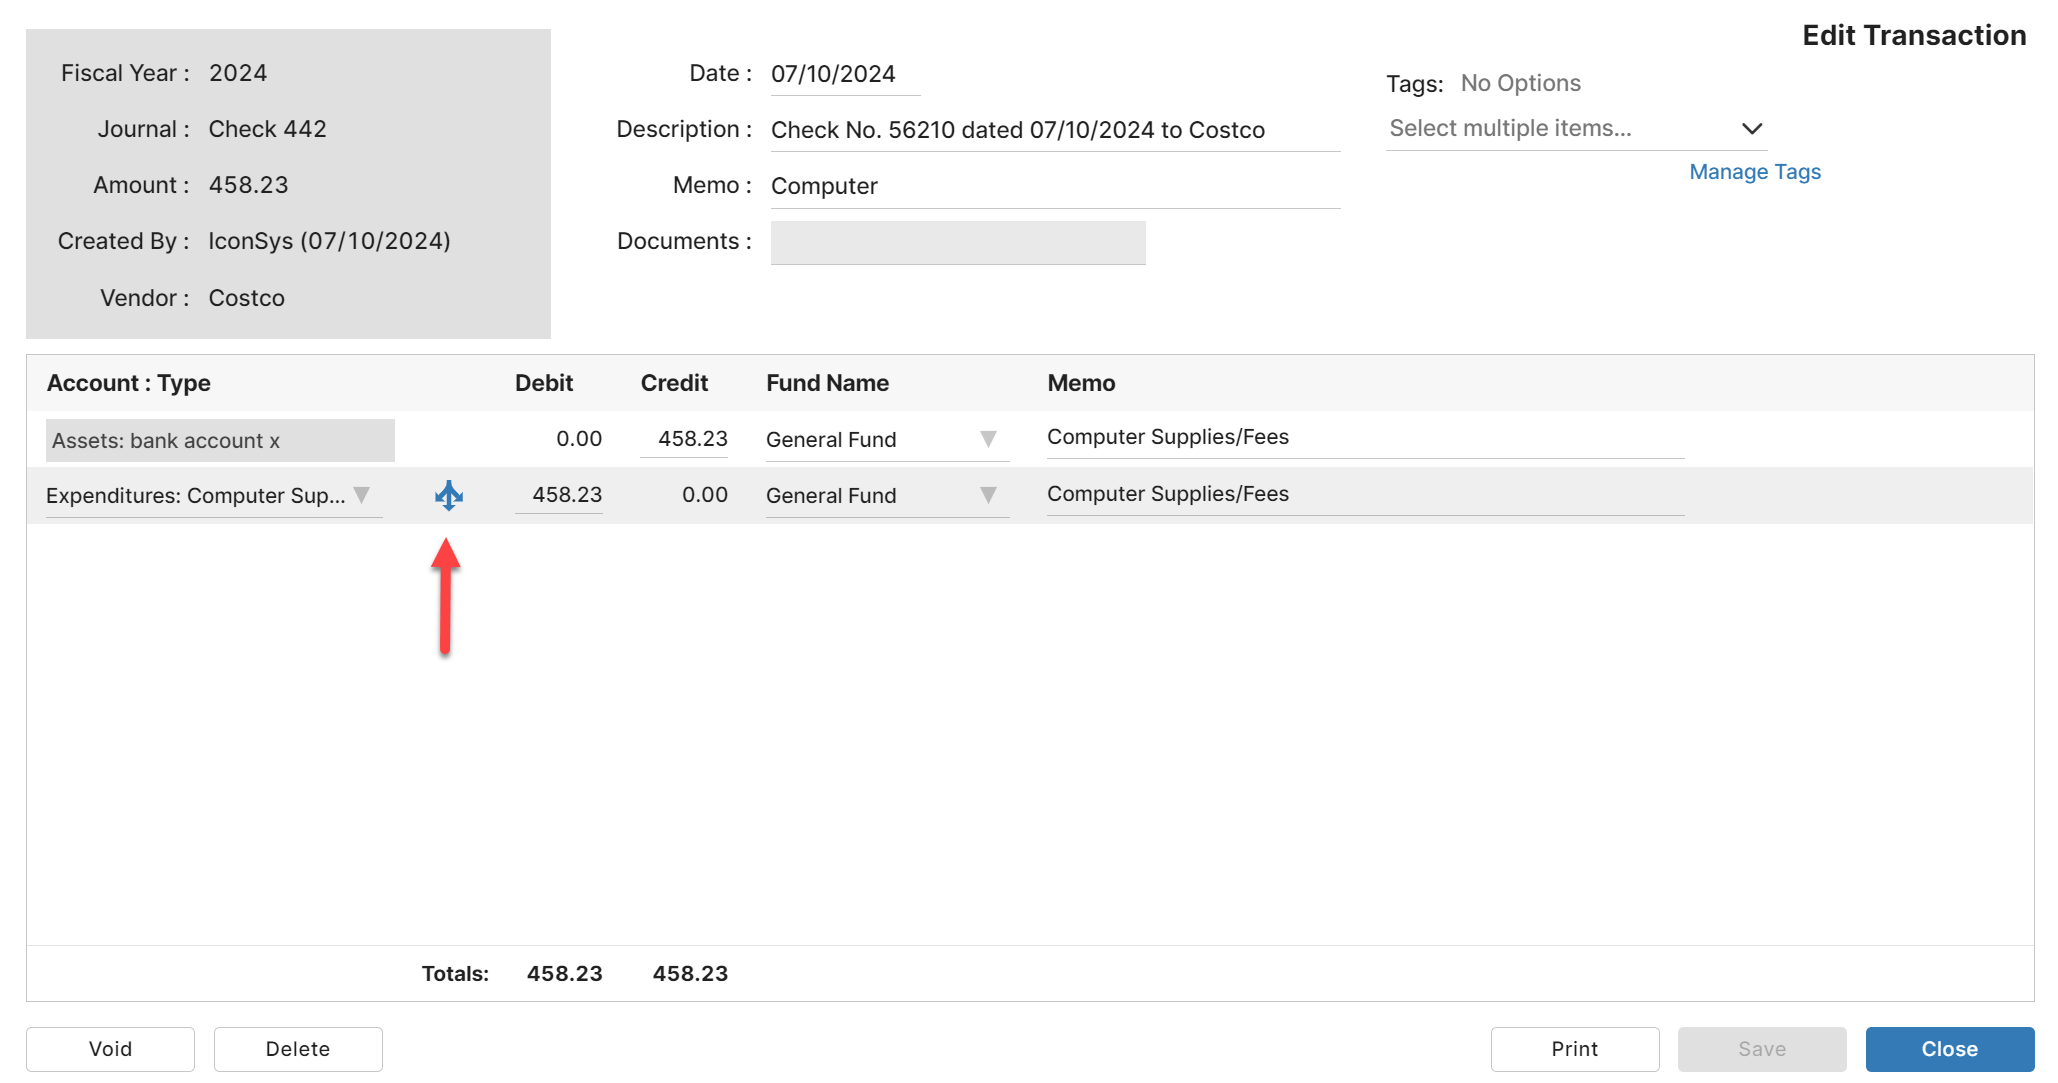
You should see a window like this once you click the distribute link.
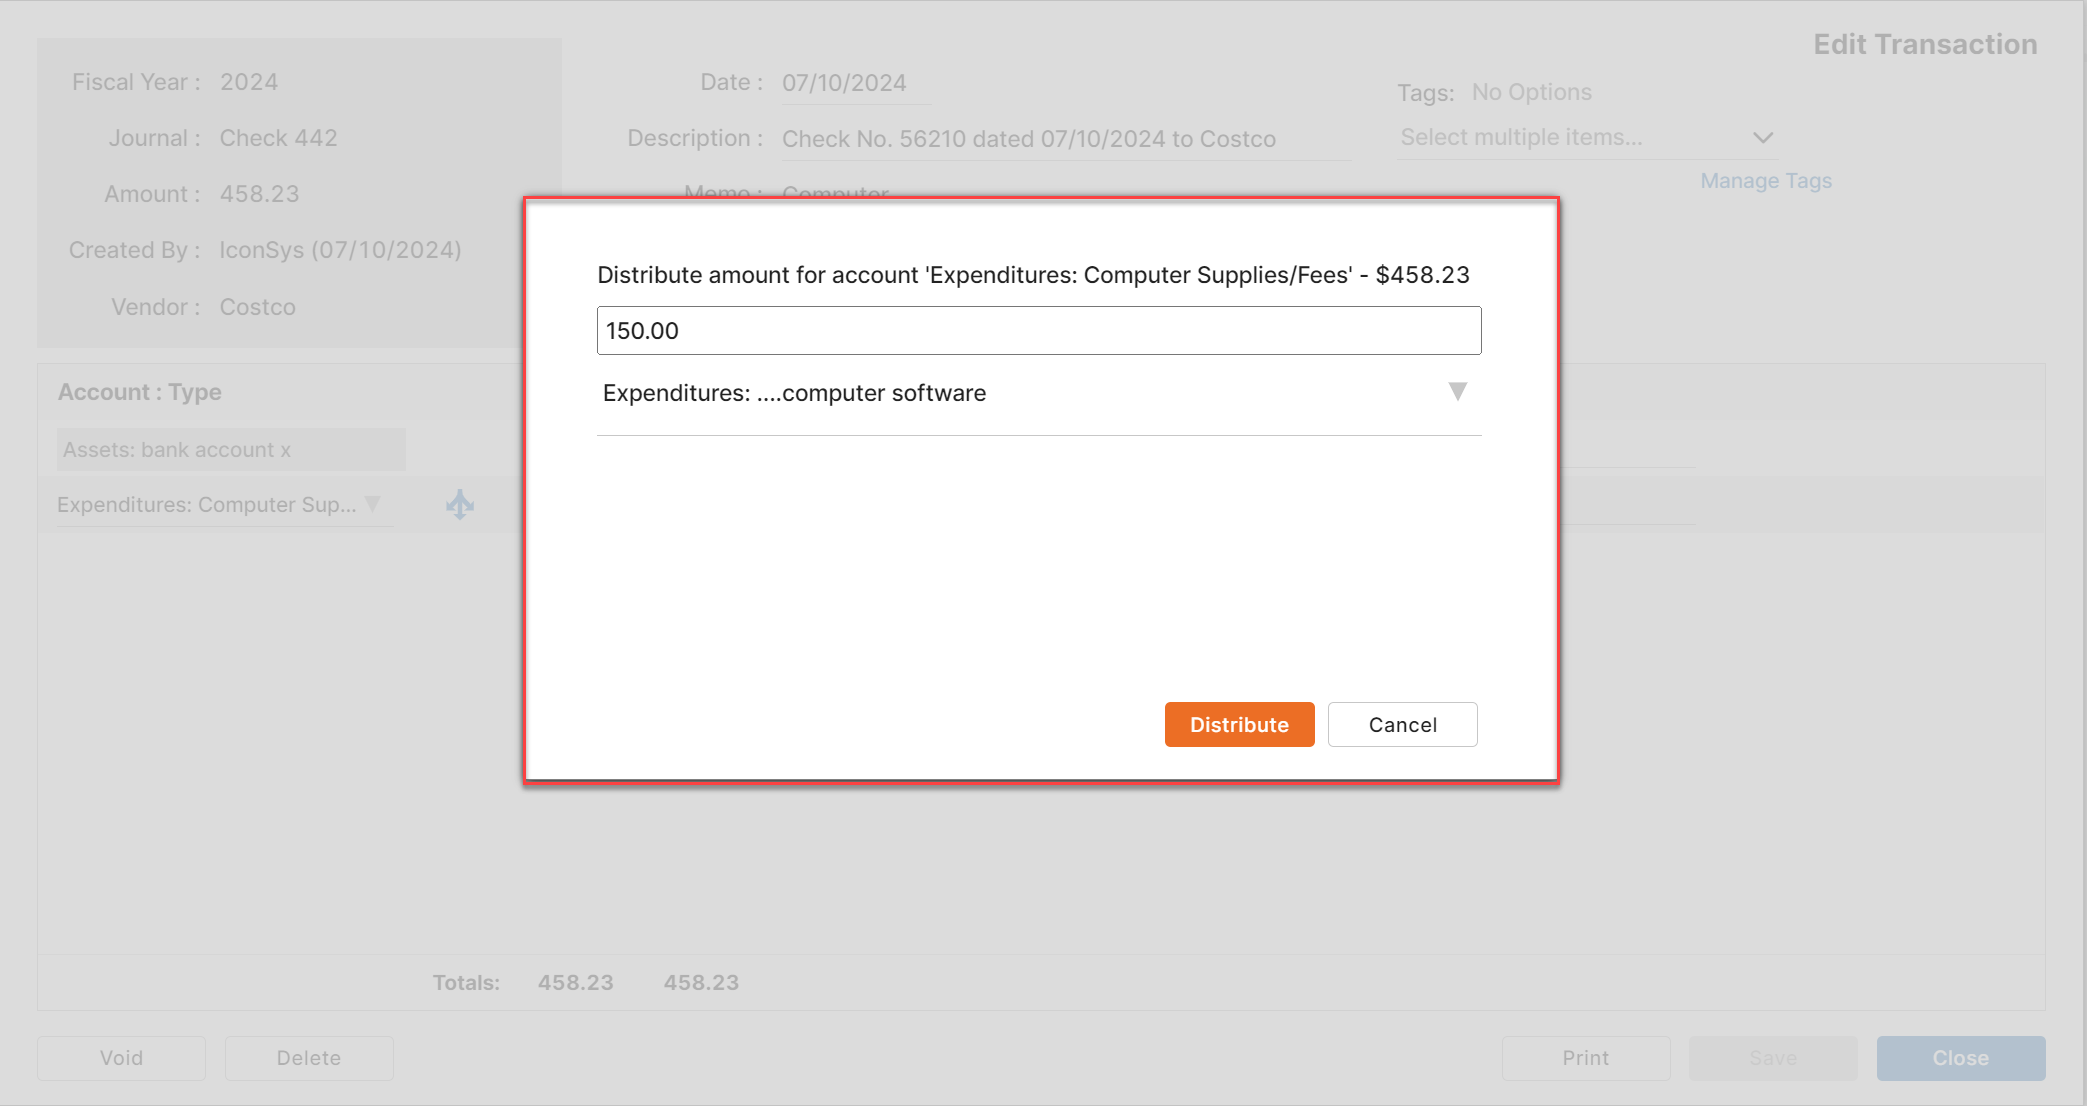
After you click the Distribute button, you will see a screen showing all the changes, in a light blue, that are going to happen which if you agree you will then click the “Save” button.

If you ever want to see the changes made on a transaction those are found under the Audit Log menu — General-Ledger: Audit Log.
Leave a Reply